Sunday, January 5, 2014

Specialized Pedal Rebuild


Wait...Specialized doesn't make pedals you say. These are a pair of old Specialized pedals from the 80's. I believe they are MKS with a Specialized stamped on the back side, so technically you might be right.
The first thing you want to do is get all the tools you are going to need. A magnetic bowl to put your parts in is real handy, a 6mm allen wrench to hold the axle from the backside, a 12mm wrench to untighten the lock-nut, and a pedal cap wrench.

You can get the job done with channel locks or pliers as last resort, but the pedal cap wrench get the cap off without marring the cap in any way.

Now that the cap has been removed, now you can loosening the lock nut. It might surprise you, but both the right pedal and left pedal are right hand thread for the bearing adjustment. Since the threads that thread into the pedal on the left side are left hand thread and follow the law of precession.

All bearing cone, washer, and locknut are in the bowl for inspection. Looks like we have contaminated bearings. Note: 11 bearing per side.

 The cup, bearings, and cone under the cap side are as good as you would expect.

 The backside not so much

 In a case of rust it good to have some scotch brite, Ultra fine Scotch brite, and  ultra fine steel wool.

After a once over...

 ...upon closer inspection the spindle's bearing surface is pitted. It's never going to be perfect again. You can only do the best with what you have left.

 I started with medium grit emery paper, then fine, 400, 600, grit wet sand paper back by a small file

 Chuck the axle in you drill and polish with some ultra fine scotch brite.

It's far from perfect, but it was a lot better than what you had. Even if you spent the time sanding out all pits, odds are you would deform and enlarge the shape of the bearing surface. Now if you have a lathe or mill, we might have a solution.

Now it's time to work on the cup. Dremel makes a nice small, fine, stainless wire brush that removes a lot of the muck.

 Dremel also has 3 different grits of polishers that come in real handy for things like this.

Like I said, It's not perfect, but it makes the best of what you have. I've heard of people using JB-Weld to fill the pits. suspect it would work great for a while, but over time after the grease gets ground into the JB-Weld I suspect it will dislodge and possible lock up your bearings.

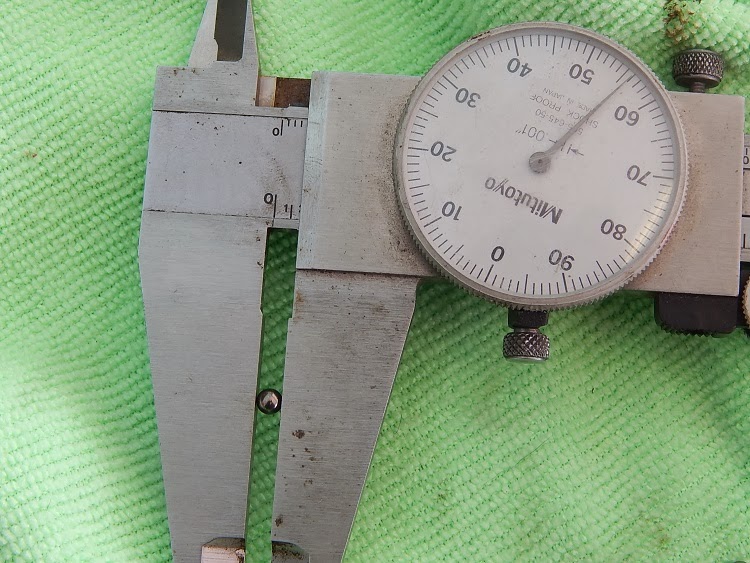
 Toss all the old bearings, even the best ones. Just to double check 0.156" or 5/32"

Now pack with a quality grease like Phil Wood .

Now after it's been reassembled and adjusted I'd put the smoothness factor at a little below a Shimano 105 so to speak. Remarkably there were no tight and loose spots, and the bearing feel is real consistent. I've felt new pedals that didn't run as smooth, so take away from that what you can.

Monday, December 23, 2013

Water Bottle Braze-ons on a Downtube

Adding water bottle braze-ons on a down-tube
You can do this without a jig, but the jig helps to keep the holes 63mm apart. On the down-tube I have good luck drilling the first hole 185mm from the seat-tube. This gives enough clearance for a 2nd bottle cage on the seat-tube that will be added later.

63mm center to center right on the mark.

After a thorough cleaning of the water bottle bosses and reinforcements, its a good idea to double check that the water bottle boss still fits 1/4"

Everything fits up nice and snug.

Oppps...How did that Ridgewood, cinnamon roll get there?  I guess I need to clean that too in short order.

 Everything is cleaned and fluxed and ready for silver.

Post brazing still hot on the rack. It was really clean, so the silver flowed well and now not a lot of clean up. In and out without burning the flux. It pays to spend the time to make sure everything is surgically clean including the brazing rod..

After de-fluxing and given the once over they look pretty good. I suspect I'll fuss over it a little more before it goes to the painter


Mounted and fully functional. Now on to the seat tube.


Saturday, December 21, 2013

Marzocchi Bomber Z2 Atom Sport Rebuild

The Marzocchi Bomber Z2 Atom Sport Rebuild

Start first by cleaning the fork really well on the outside, this will prevent dirt on the outside from falling on the inside when you are disassembling.

Disassembled, inspected, and ready to be reassembled. Marzzochi suggesst 7.5wt, but you can also use 5wt, 10wt. So why change the weight of the oil, when you can adjust the dampening rate. If you weight 100lbs, you will not be able to get all the adjustability from your fork as if you weight 205lbs. If you find you have the dampening valve all the way open, and you still want more dampening, you can change the oil in your fork with a heavier weight to achieve that.

A close inspection of the oil tells me all is good. It's not dirty, and there is no sign of gray from degrading metals.

Inside clean as a whistle.

With aluminum parts it's very important to torque things down to spec.

After the new oil has been cycled through, the oil level, when the fork is compressed is supposed to come between 40mm to 35mm from the top.

More torqueing.

25Lbs in each leg.

As they say, "The job is not finished until the tools are cleaned and put away. After working on a fork with fluid dampening, it's very important to clean the pads to ensure the pads are not contaminated with fork fluid. Fork fluid could discolor anything that is painted that you might clamp up next time.

Sunday, December 8, 2013

The Blackburn Ultra Trackstand Fix

Do you have a $250, Blackburn, Ultra Trackstand that is locking up and binding? I've got the fix.

It used to work flawlessly for a long time, then at the end of last season it start locking up and binding like a lot of people have reported. It's a shame because of all he trainers I've ridden over the years, It's the closest thing to a road feel I've felt. It's got resistance, but because of the heavy flywheel, it's got a long spin down.
The problem is those 3 clear pieces of tubing they are using for bushings. They get soft over time, either because of heat, or oil; probably both.

Once they get soft, they don't allow the friction plate to slide the way it should. I've tried greasing and oiling them with many different types of lubrication. The problem is the material is too soft, so they need to be replaced.
Replaced by these bronze bushings. The plastic bushings measure close to .25" inside diameter x .440" outside diameter. Fractionally that works out close to 1/4" x 7/16". I wasn't able to find that spec at the hardware store, only 1/4" x 3/8". The outside diameter is 1/16" undersized which works out fine because we want it to be a little loose so things slide. You only need 2 because the bushing only need to be 1/2" long.

1/4" was a little tight, and they didn't slide loose. A little work with a rotary file chucked in my hand drill does the trick.

The bushings are longer than the plastic ones, but for me the plate fits over just fine, and once assembled the trainer worked good as new. The bushing ran $3 a piece, so for a $6 investment as well as a 1 hour time I've got my trainer back in action.

Thursday, December 5, 2013

Brake Maintenance

Time to replace the brake shoes?
As you can see there are some aluminum splinters from the rims, and some pitting from road debris embedded in these brake pads. Sometimes you can clean it out, but in this case I'm just going to replace the pads. Not only does the aluminum and road debris erode your brake performance, but they dig and grind grooves into the face of the rim's braking surface further eroding brake performance both mechanically, as well as the feed back you get. You get better feed back when the pads rub the rim, rather than grinding the rim.
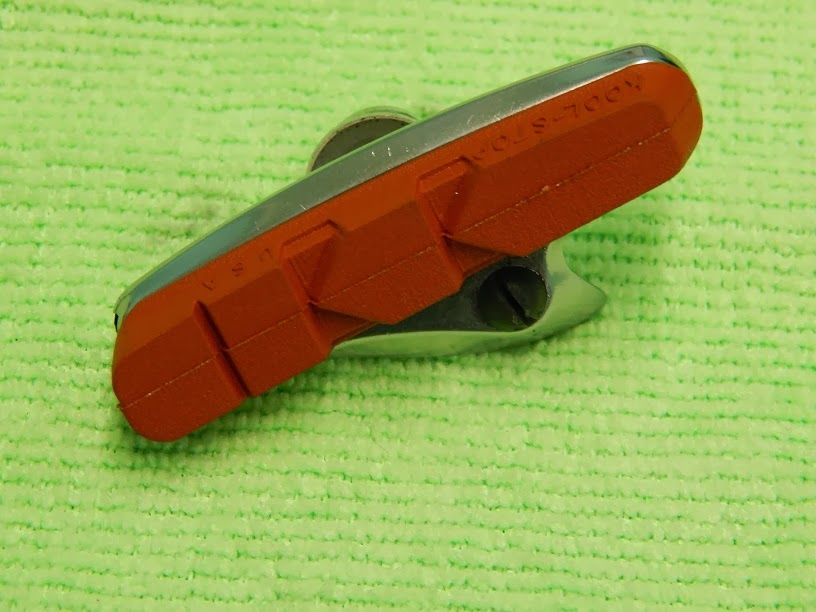
There are many different kinds of brake pads out there. I like the Kool Stop Salmon pads. They are recommended for wet weather, but you can use them on all conditions. I don't know anybody that changes brake pads before they go ride in wet weather, so why not always be prepared for the worst conditions? Not only are they aggressive, they also have a special tip that cleans the rim of debris.


Ahhhhh Happy Brake Pads!

Next grab some 0000 steel wool to clean the rim face.
The 0000 works the best. The wool is fine enough to get into all the little grooves to clean them out.  I use steel wool because it's a non-chemical means to clean the rims so I don't leave any chemical residues. If the rim is bad enough use some soap and water first, then finish with 0000 steel wool.
As you can see the left side is dirty, and the right side is cleaned. When you work the steel wool on the rim it will start grabbing with it is clean. It's a good idea to add cleaning your rims into your maintenance schedule. It will reduce buildup and well as any take the edge off any grooves that my develop.
Also I'd like to mention some rims have wear indictors. That's hole is not a blemish. Once the rim's braking surface wears down so the hole is gone, or close to it, then it's time to think about some new rims or wheels. Well....Happy Breaking!